Click fraud - competitors, bots, or bored people repeatedly clicking your ads - burns budget without ever converting. Ninja Shield watches your landing pages for exactly this pattern: the same visitor clicking your ads over and over in a short window. When it spots one, it can either hold the IP for your approval or block it automatically, and it keeps a running estimate of how much budget that saved.
Where to find it & plan availability
Go to Optimize → Ninja Shield in the left sidebar, or open /dashboard/shield directly. Ninja Shield is a PRO/ENTERPRISE feature - if your plan doesn’t include it, the page shows an upsell card instead of the live tool. Once you’re on a qualifying plan but haven’t connected a Google Ads account yet, you’ll see a short “connect your account” prompt instead.
If you manage more than one account, use the account selector in the top-right of the page - everything on the page (stats, review queue, rules, allowlist) is scoped to whichever account is selected.
Step-by-step walkthrough
1. Install the tracking snippet
The first time you open Ninja Shield for an account, you’ll see a short setup flow:
- Google Ads connection is checked automatically (no action needed).
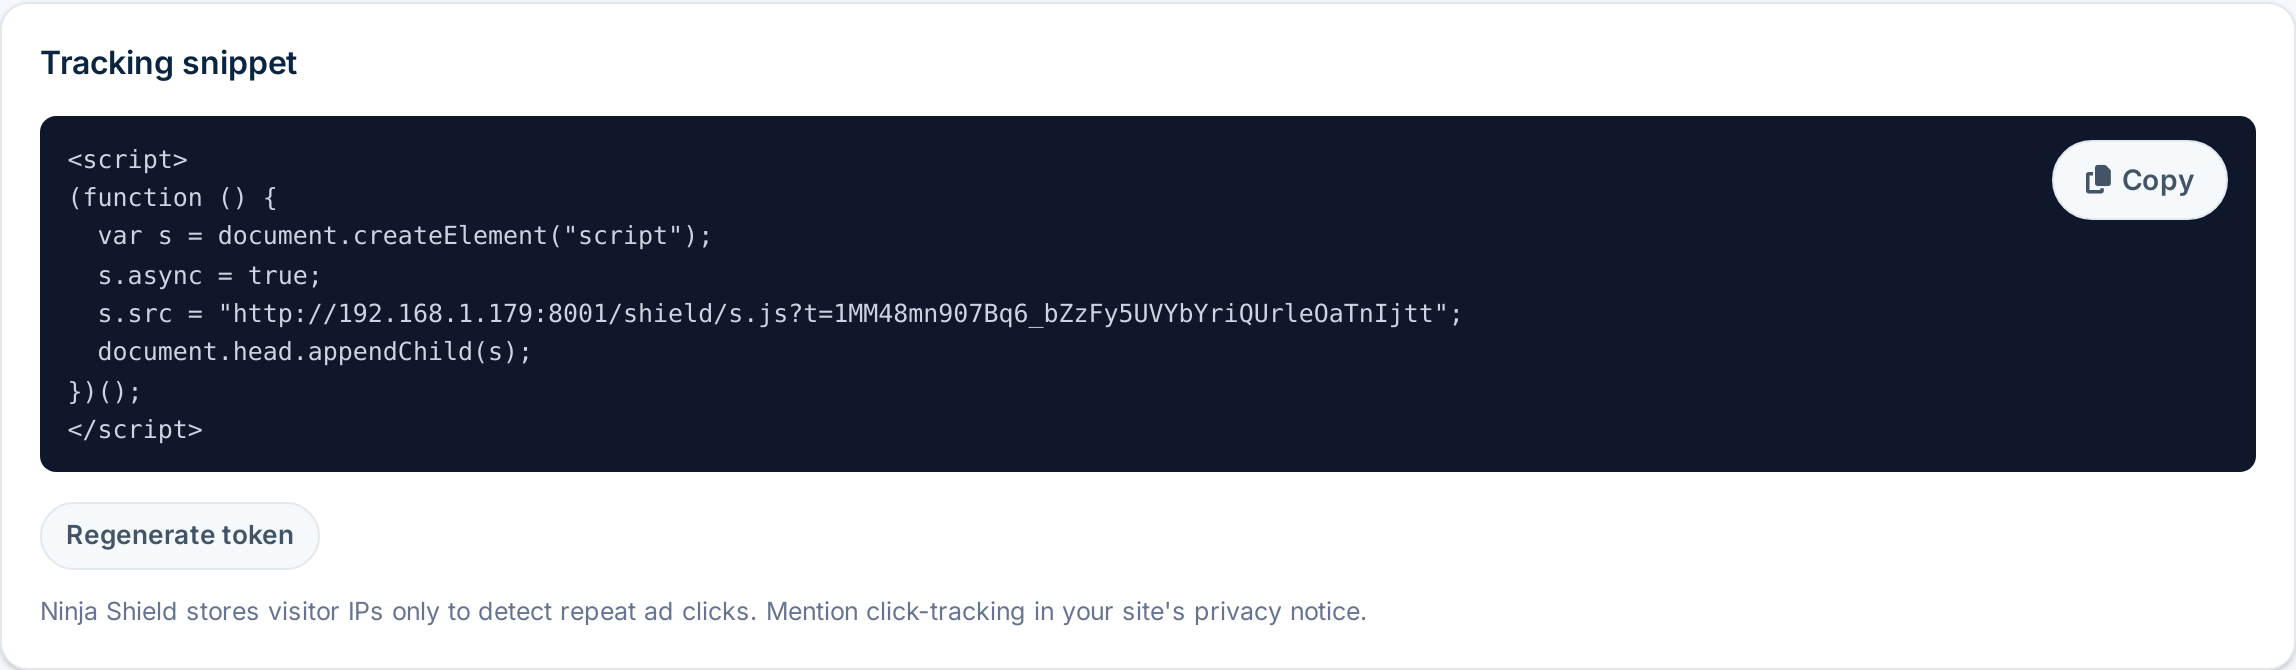
- Copy the tracking snippet shown on the page and paste it just before the closing
</body>tag on every page of your website (or add it via Google Tag Manager). This is a small, async script that reports ad clicks (gclid/gbraid/wbraid) back to Ninja Shield - it never blocks or slows down your site. - Click Verify once the snippet is live. Ninja Shield checks for a beacon from your site in the last 15 minutes.
- Click Activate protection to turn Shield on for this account.
2. Understand the live dashboard
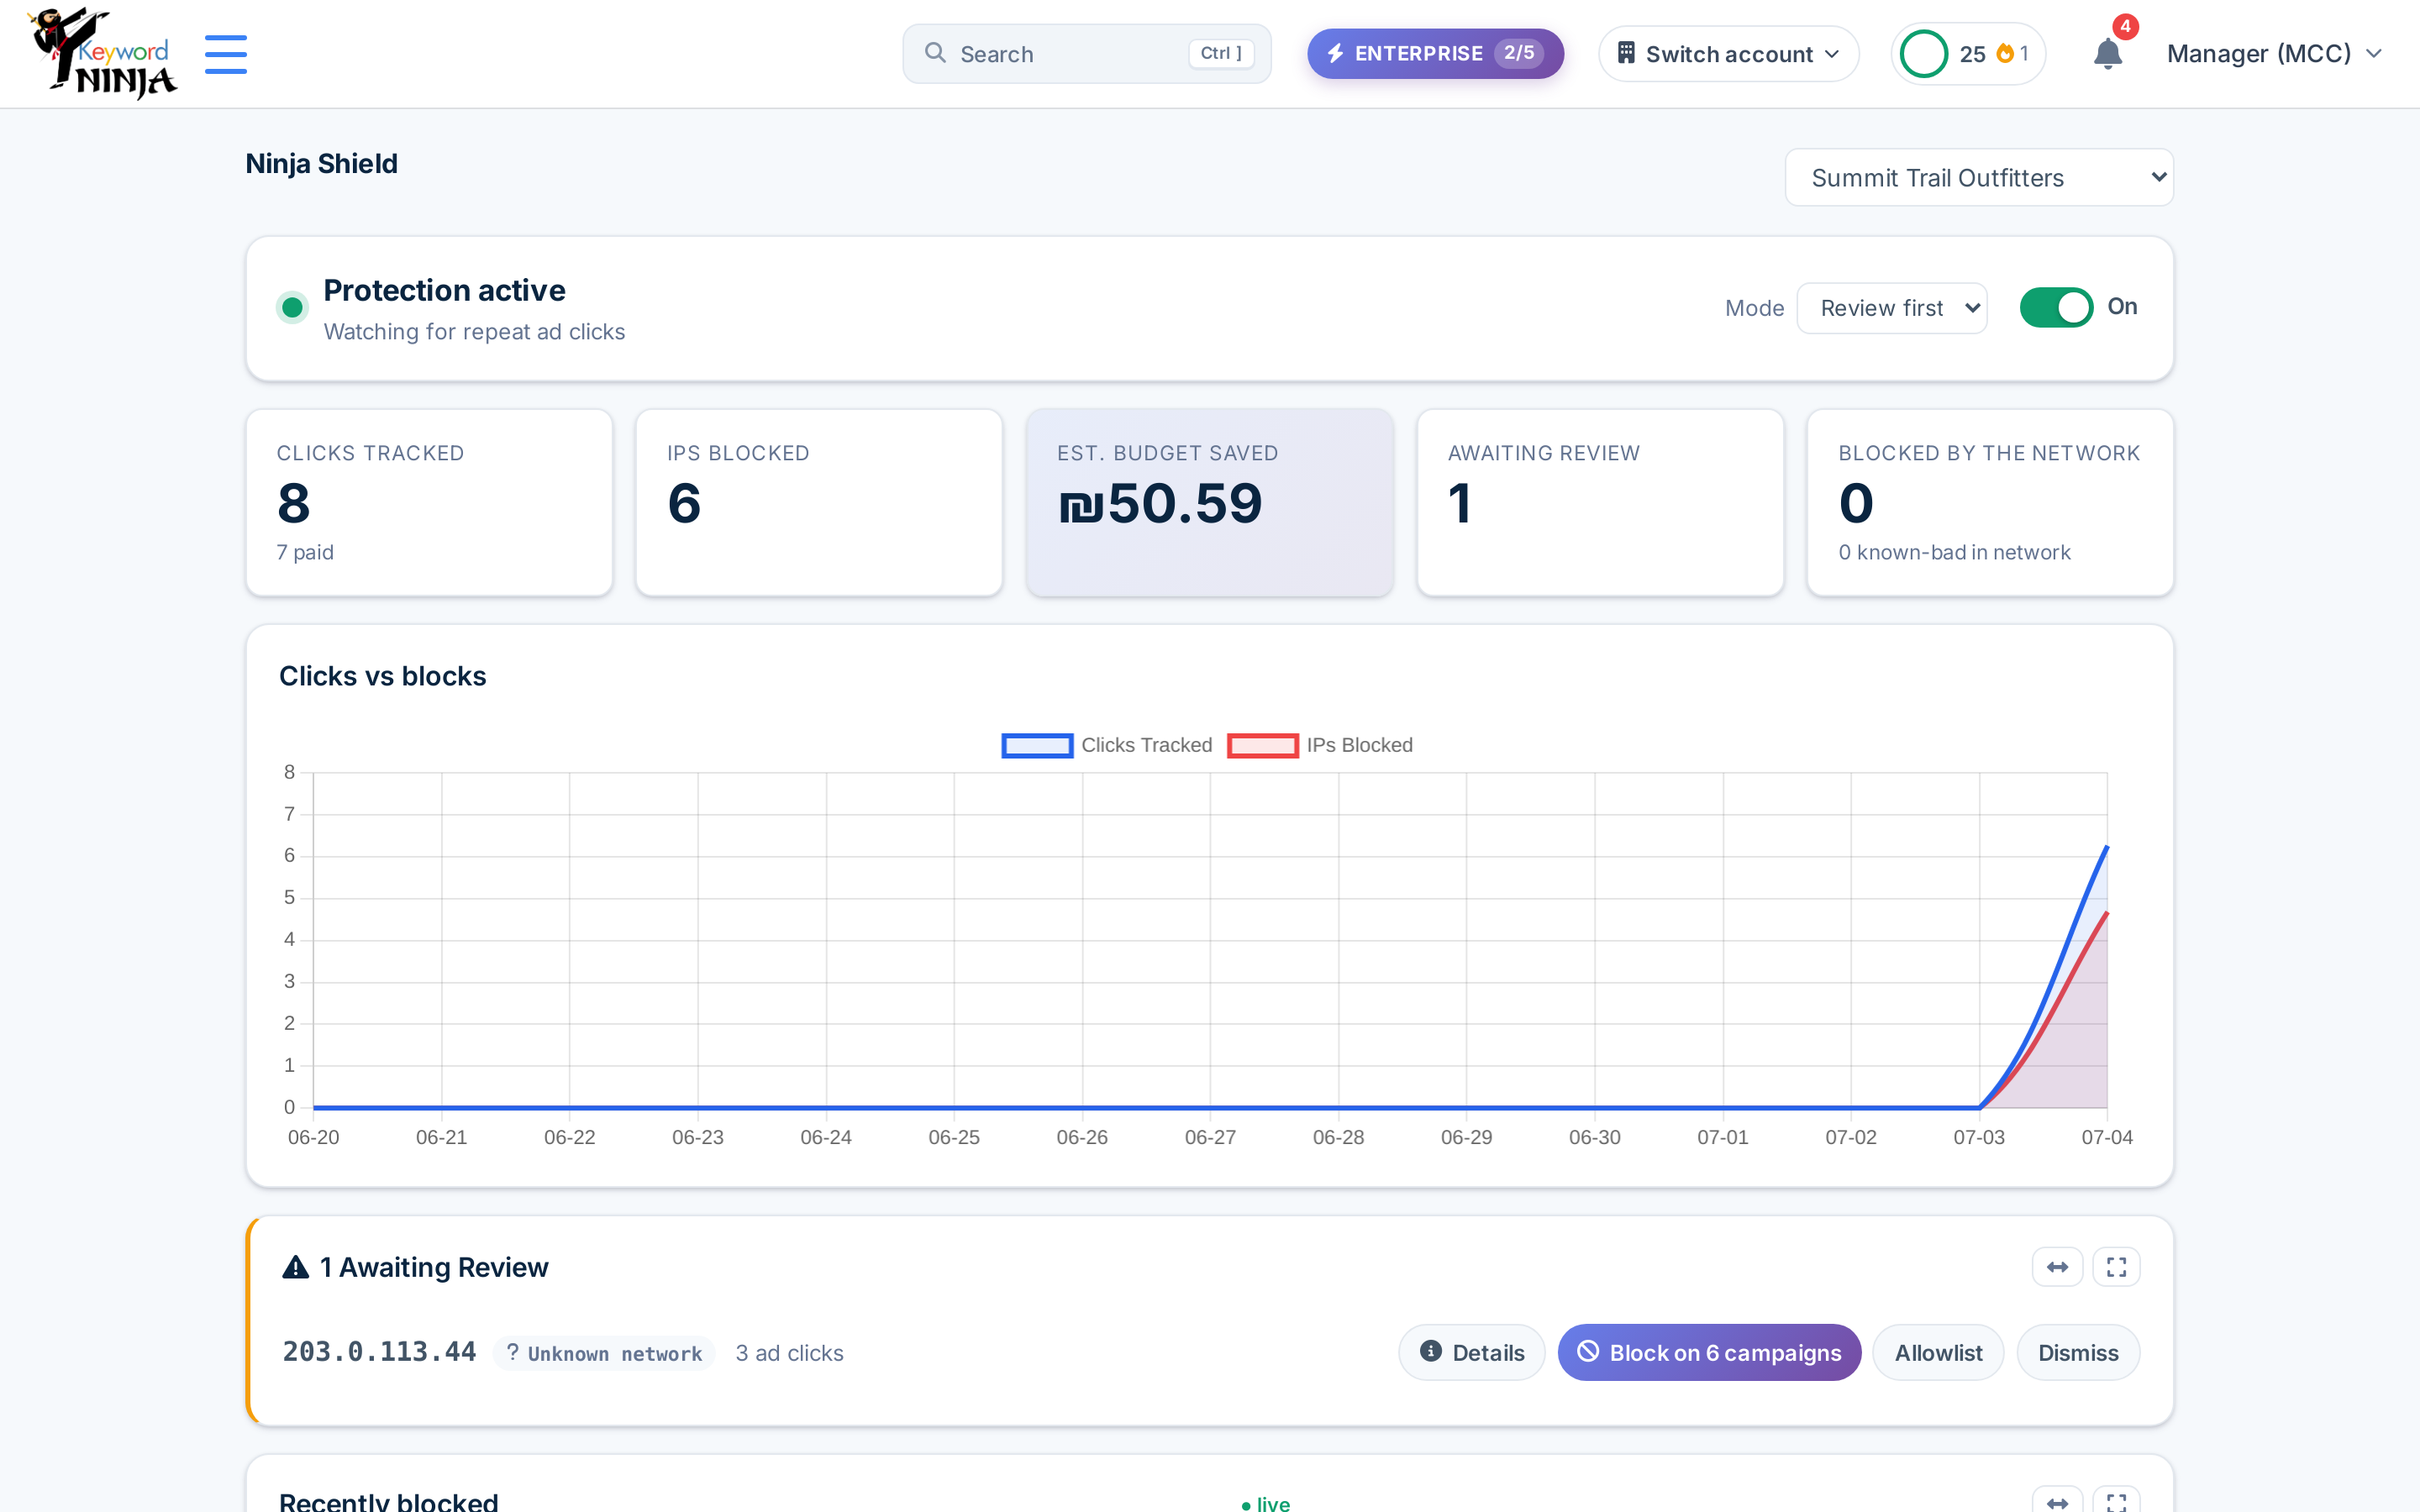
Once protection is active, the hero card at the top shows Protection active with a green dot, the current Mode (Review first or Auto-block), and an on/off toggle. Below it are five stat tiles - Clicks Tracked, IPs Blocked, Est. Budget Saved, Awaiting Review, and Blocked by the network - plus a 14-day Clicks vs. Blocks trend chart.
3. Review flagged IPs (Review-first mode)
By default, Ninja Shield runs in Review first mode: when an IP crosses your threshold, it lands in the Awaiting Review card instead of being blocked immediately. Each row shows the IP, a network classification when available, and how many ad clicks it made. From there you can:
- Block on N campaigns - push a Google Ads IP exclusion at the ad-group level across every eligible campaign.
- Allowlist - mark it as trusted so it’s never flagged again (see below).
- Dismiss - clear it from the queue without blocking or allowlisting.

4. Check the “Recently blocked” feed
Approved or auto-blocked IPs show up in the Recently blocked table with the campaign count, click count, reason, estimated savings, and status. You can Undo a block straight from this table if you approved one by mistake.

5. Tune the protection rule
The protection rule controls what “repeat clicking” means for your account: Block an IP if it clicks my ads N times within [window], on [scope]. Out of the box that’s 3 clicks within 24 hours, on all Search campaigns. You can tighten or loosen the threshold, change the window (1-168 hours), and choose whether a block applies to all Search campaigns or just the one the click came from.

6. Add trusted IPs to the allowlist
If your own office, agency, or QA team’s IP address triggers false positives, add it to the Allowlist (never block). It accepts CIDR ranges (minimum /24 for IPv4, /48 for IPv6) so you can cover a small office network in one entry, or click Allowlist my IP to add your current IP with one click.

Tips & best practices
- Start in Review-first mode (the default) until you trust the signal for your traffic - Auto-block pushes exclusions immediately with no approval step.
- The default rule is 3 clicks in 24 hours - tight enough to catch obvious repeat-clicking, loose enough to avoid flagging someone who genuinely clicked your ad twice while comparison-shopping.
- Only paid clicks count by default - Ninja Shield only counts visits carrying a
gclid/gbraid/wbraidparameter toward the threshold, so ordinary page reloads of the same visit don’t inflate the count. - A block applies to all your Search campaigns by default, not just the one that was clicked - most click fraud isn’t campaign-specific, so this is the safer default. Narrow it in the protection rule if you’d rather scope blocks per-campaign.
- Google Ads caps IP exclusions at 500 per campaign. If Shield needs to add a new exclusion past that cap, it automatically frees up room by evicting its own oldest/lowest-value exclusions first - it never removes an exclusion you added manually.
- Turn on “Anonymize IPs” if you need to store click data in GDPR-truncated form (drops to a /24 for IPv4, /48 for IPv6 before it’s even saved).
- Opting into the fraud network lets you both contribute your auto-blocks to a shared reputation list and benefit from IPs other accounts have already flagged - an IP needs to be independently blocked by several accounts before it’s shared, so one person’s mistake can’t poison the list for everyone.
Troubleshooting & FAQ
The Awaiting Review / Recently blocked cards aren’t showing up. They’re hidden until there’s something in them - if you have zero pending reviews and zero blocks, that’s expected, not a bug.
I approved a block by mistake. Use Undo on that row in the Recently blocked table - it removes the Google Ads IP exclusion.
A blocked IP is still clicking my ads. Give it a few minutes - Google Ads exclusions apply to future clicks and can take a short time to propagate, and the block may only cover the campaigns it was applied to.
I don’t see a “Not yet set up” state anymore after activating. That’s expected - once protection is active, the setup wizard hides itself and only the live dashboard shows.
This page requires a plan upgrade. Ninja Shield is a PRO/ENTERPRISE feature; the page shows an upsell card with a link to Pricing if your current plan doesn’t include it.